Did you know that Microsoft Office Home and Student 2007. It’s a great value for your family since it can be installed on up to three PCs in your home.
Month: May 2009
Free E-learning for Windows 7
Just found this today
Clinic 10077: What’s New in Windows 7 for IT Professionals
This two-hour clinic provides you with an overview of the new and enhanced deployment, security, manageability, and performance features in Windows 7. It describes how these features meet the day-to-day needs of IT professionals.
This clinic covers the following topics.
- Overview of Deployment Enhancements
- Overview of Security Enhancements
- Overview of Manageability and Performance Enhancements
IT professionals completing this clinic should have basic familiarity with deploying, managing, and maintaining Windows Vista or the Windows XP operating system.
Objectives
At the end of the course, students will be able to:
- Describe the new and updated deployment features and tools for Windows 7.
- Describe new and enhanced security features in Windows 7.
- Describe the improvements in performance and manageability in Windows 7.
- To take this course go Here
Microsoft IT Academy Student Pass
The is a special no-cost online learning opportunity for students. IT Academy Student Pass provides free e-learning courses to verified students who are interested in extending their technical skills with Microsoft technologies.
The IT Academy Student Pass offers 12 to 22 hours of FREE e-learning courses, aligned to the first set of topics you need to master for the first Microsoft certification exam within the track. Each track is unique, and most will require you to take additional e-learning courses to complete all of the topics you need to succeed on the certification exam.
The goal of the IT Academy Student Pass is to give you a head start by providing hours and hours of rich, award-winning e-learning content that sets the stage for the learning to come.
Students may also want to explore Microsoft technical certifications, and the IT Academy Student Pass is a perfect entry point to five different certification paths. Learn about Microsoft Certifications
The IT Academy Student Pass will be available initially in English, but additional languages are being considered for future releases, to get this deal go here
More on Office 2010
1. Office 2010 will be available in both 32-bit and 64-bit versions.
2. Office 2010 will run on Windows XP SP3, Windows Vista, and Windows 7.
3. Groove becomes SharePoint Workspace. This is true. Please read the Groove SharePoint Workspace team blog here for the scoop.
4. OneNote and SharePoint Workspace going into the ProPlus SKU.
Get the Scoop on the Microsoft Office 2010 and SharePoint 2010
Want to learn more about Office 2010
go here for Office,and from the SharePoint blog
Announcing SharePoint Server 2010 Preliminary System Requirements
We’ve heard loud and clear that you want system requirements information as early as possible to assist in your budgeting and planning, so today we’re happy to announce (and confirm) some preliminary system requirements for SharePoint Server 2010:
- SharePoint Server 2010 will be 64-bit only.
- SharePoint Server 2010 will require 64-bit Windows Server 2008 or 64-bit Windows Server 2008 R2.
- SharePoint Server 2010 will require 64-bit SQL Server 2008 or 64-bit SQL Server 2005.
In addition to the requirements listed above we also wanted to share with you some preliminary detail about SharePoint Server 2010 browser compatibility.
To ensure the best possible experience across multiple browsers we’re focusing our SharePoint 2010 engineering efforts on targeting standards based browsers (XHTML 1.0 compliant) including Internet Explorer 7, Internet Explorer 8 and Firefox 3.x. running on Windows Operating Systems. In addition we’re planning on an increased level of compatibility with Firefox 3.x and Safari 3.x on non-Windows Operating Systems. Due to this focus Internet Explorer 6 will not be a supported browser for SharePoint Server 2010.
So, what can you do today to get into the best shape for SharePoint Server 2010?
- Start by ensuring new hardware is 64-bit. Deploying 64-bit is our current best practice recommendation for SharePoint 2007.
- Deploy Service Pack 2 and take a good look at the SharePoint 2010 Upgrade Checker that’s shipped as part of the update. The Upgrade Checker will scan your SharePoint Server 2007 deployment for many issues that could affect a future upgrade to SharePoint 2010.
- Get to know Windows Server 2008 with SharePoint 2007, this post is a great starting point.
- Consider your desktop browser strategy if you have large population of Internet Explorer 6 users.
- Continue to follow the Best Practices guidance for SharePoint Server 2007.
- Keep an eye on this blog for updates and more details in the coming months.
Windows 7 Talk Trumbull CT
I be talking about Windows 7 at the TPCUG MEETING
at the Trumbull Library Community Room
33 Quality Street, Trumbull, CT on Thursday night May 21, 2009 at 7pm come join us.
Security and Privacy – Data breach information
A Privacy breach is an unauthorized disclosure of personal confidential information that violates state or federal privacy laws. In the event of a privacy breach, the following procedures should be followed to ensure the appropriate level of response
To understand data breaches we first need to see how bad it is.
To see a Chronology of Data Breaches by year go here
To see the law by each state go here.
A Cool Trick
Do you ever get a document in a different langue that you do not understand get Windows Live Translator !
It works for both Office 2003 and Office 2007 !, just download the installer here.
Here are some details for both Office versions:
Office 2007: http://blogs.msdn.com/translation/archive/2008/08/06/office-document-translation.aspx
Office 2003: http://blogs.msdn.com/translation/archive/2008/08/11/office-2003-setup-instructions.aspx
Tip: Create a New Failover Cluster in 12 Steps
Once you’ve thoroughly researched and planned your implementation of Failover clusters, you’re ready to actually create the cluster. The mechanism to create and manage Failover clusters is the Cluster Administrator application, part of the Administrative Tools folder.
To create a new Failover cluster, follow these steps.
(Note that the first three steps must be performed on all nodes that will be part of the Failover cluster.)
Tips RSS Feed
Subscribe to the TechNet Magazine Tips RSS feed.
1. Open Windows Server 2008 Server Manager from the Administrative Tools folder.
2. Select Features in the left pane and click Add Features in the right pane.
3. Select Failover Clustering in the left pane and click Next.
4. Open Failover Cluster Management from the Administrative Tools folder. In the center pane, click Validate A Configuration from the Management section.
5. On the first screen of the Validate A Configuration Wizard, enter the network name of each node. You should select all of the nodes that are available to ensure that your testing validation is as accurate as possible.
6. Click Next to show the Testing Options page. You should run all tests to ensure that you fully test your configuration. If you are running the validation process of failing a previous validation, you can run only the tests that were not successful earlier.
7. Click Next to verify the tests to be performed. Once the tests are completed, the Summary page will indicate whether the tests were successful and whether the configuration is suitable to use as a Failover cluster.
8. Click Finish to end the Validate A Configuration Wizard. If errors were reported, fix the problems indicated and run the wizard again. If the validation was successful, click Create A Cluster in the Failover Cluster Management window.
9. Once the Create Cluster Wizard starts, you need to enter the names of the nodes that will be used to form the cluster. These should be the same nodes you entered previously during the validation process.
10. Click Next to proceed to the Access Point For Administering The Cluster page. On this page you need to enter the cluster name and IP address that will be used to identify and administer the cluster once it is created. The cluster name and IP address will be the virtual name registered in DNS and will be used to connect and manage the cluster itself. This information is usually different than the name and IP address that will be used by clients to connect to clustered applications.
11. Click Next to validate the settings and proceed to the Confirmation page. Ensure that all the information is accurate for the creation of the cluster. If not, click Previous to go back and change the settings. Otherwise, click Next to proceed to the cluster creation page.
At the completion of the cluster creation process, the Summary page will show you the results. If there were no errors, your cluster was successfully formed. If there were any errors, click the View Report button to get details.
12. Click Finish to exit the wizard.
From the Microsoft Press book Windows Server 2008 Administrator’s Companion by Charlie Russel and Sharon Crawford.
How to get on a Beta
I get asked all the time how do I get on a beta.
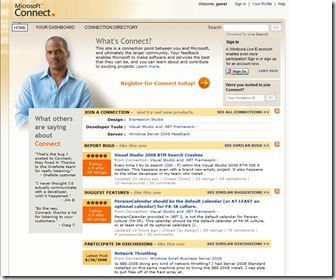
The answer is first go to Connect.Microsoft.com
Sign in using a Microsoft Live account, then click on the connection directory and choose the Beta that interests you. You will need to apply and once accepted you NEED to give feedback to the beta group
One area to Join is the
Microsoft Game Studios Beta Program
Adding…
We want EVERYONE – not just hardcore players! Whether you play once a year or every day, whether you pre-order the latest consoles or wouldn’t think of paying for a game – we want feedback from you!


